• Blog
  • Home
  • My Story
  • Patterns
  • Tools
  • Contact Us
 

Make Your Own Easy Stencil-free Quilting Templates

2/14/2017

0 Comments


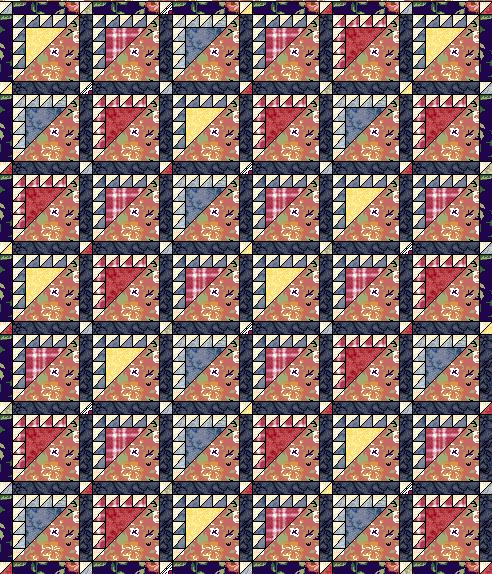
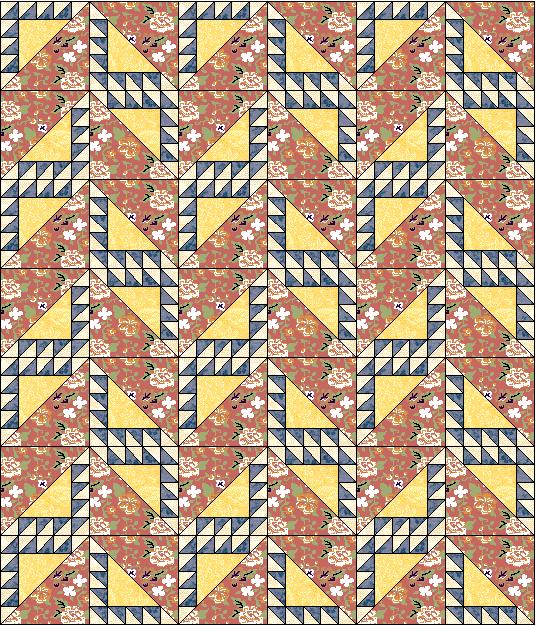
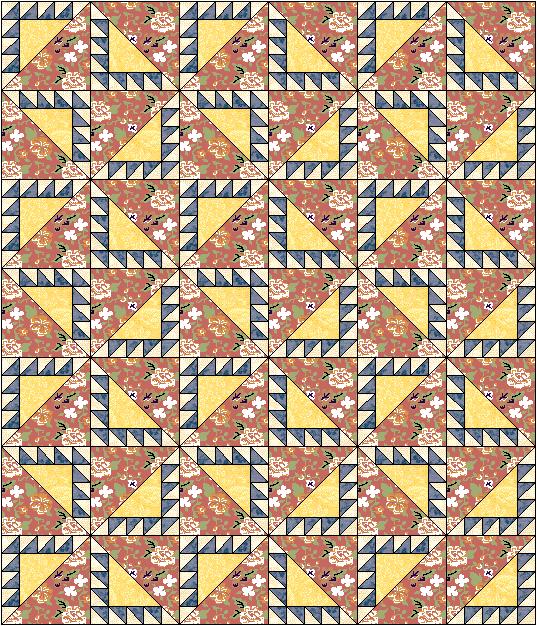
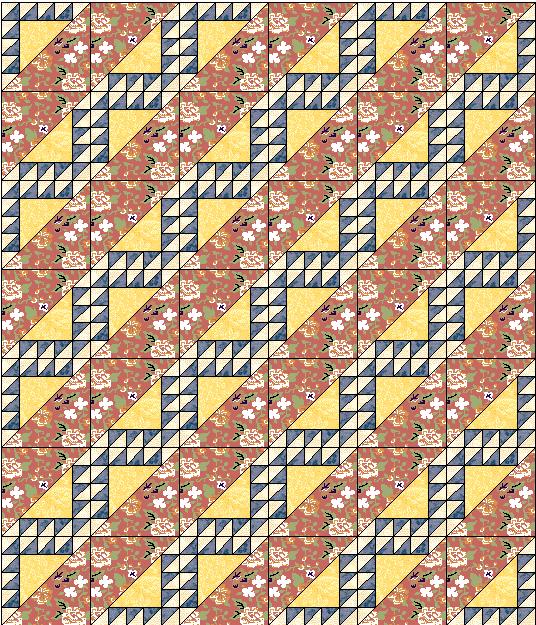
After spending months as a UFO (that's quiltspeak for Un-Finished Object), my Lost Ships quilt has finally re-emerged to be quilted.
Lost Ships quilting design
OK, to be honest, it's been waiting more than a few months. More like a couple of years, actually.  The problem was, I had to find just the right quilting design.

It couldn't be too complicated; this quilt has been in progress long enough, and I really want it finished soon. Even so, I'm not ready to settle for something boring for the sake of hand-quilting speed.

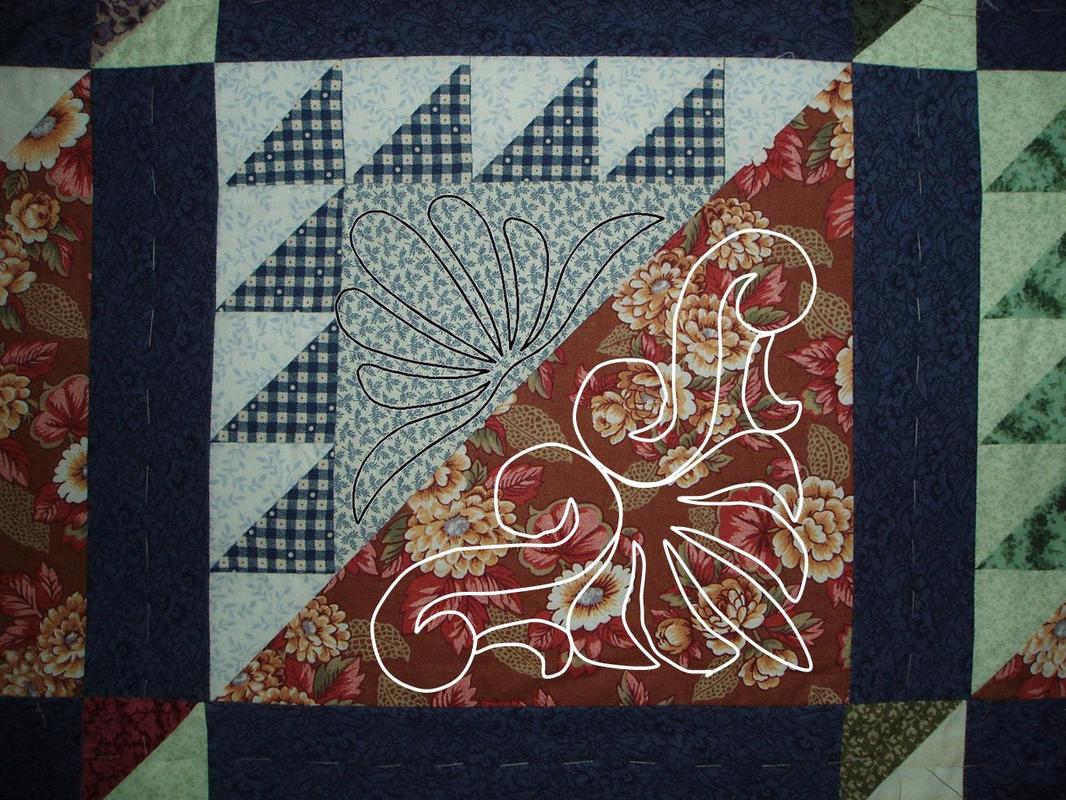
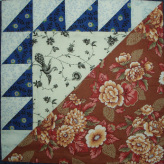
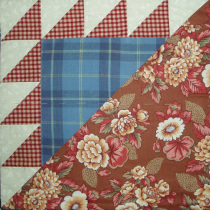
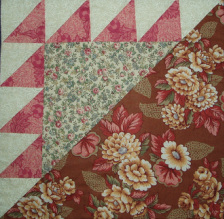
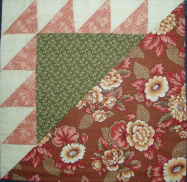
The Lost Ships block has two triangular areas of different sizes to quilt, and I wanted those designs to be related, but not identical (because that would be boring). The design also had to fit the Lost Ships theme (because I said so). 

Most importantly, the design had to be template-friendly. That is, it had to be adaptable to my stencil-free approach to quilt marking.

Using a stencil is a great way to mark a quilt. Stencils are available for lots of beautiful quilting designs from online vendors like quiltingstencils.com.  The problem is that I never seem to find what I want in exactly the right size. Sure, you can cut your own stencils.  I've done that.  Frankly, it's a job that always finds me clenching my teeth and muttering, "There's got to be a better way!"

Finally, I discovered a better way.  Unlike stencils, where the quilting lines are cut as narrow channels in the background matrix (tricky to plan and difficult to cut), my template method uses solid shapes (ultra-easy to cut).

Plus, because templates are a "trace-around" tool, they need to be somewhat rigid, but unlike stencils, they don't need to be thin.  That means you don't need that pricey mylar material for your templates.  Any card-stock will do.  A panel from an empty cereal box will do very well, as my grandmother taught me.  (My Scottish great-grandmother would approve.)

Let me demonstrate.


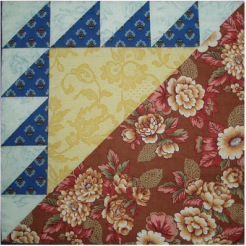
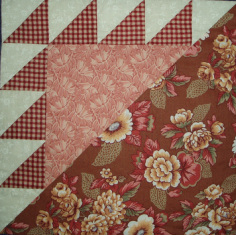
For the Lost Ships quilt, I decided on a pair of shell motifs, one quite simple, the other a bit elaborated. ​
​
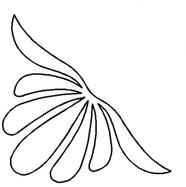
The shell motif for the smaller triangle (at right) was simple enough to cut as a template. Despite its multiple lobes, it can be cut along all its lines, and remain intact as a single shape. Marking a quilt with this template will be a straight-forward matter of tracing around the outside edges of the cut-out template.
​
Shell Quilting design
Shell quilting design
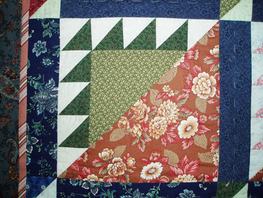
The larger shell motif (at left) is more complex. It comprises 5 distinct shapes. There's the shell, in blue, a pair of scrolls, in orange, and a pair of little connecting doo-dads, in yellow.  
​I'll cut this as 2 templates: the blue shell by itself, and all the scrolling parts together.  Again, it's very simple to mark the quilt by tracing around the templates. Lines where the yellow and orange sections intersect are easy to fill in.

Let's look at one more not-so-obvious example.  The quilting stencil shown at the right is "Follow Your Dreams," one of my favorites. ​ It's a continuous-line design; building it from discreet shapes would require several pieces that are smaller than I prefer to handle.
Follow Your Dreams quilt stencil

Instead, the design can be rendered with 3 overlapping templates. The first is the overall outline of the design, and serves to mark the boundaries of the other two, which are rotated to cover the 4 sides and 4 corners, respectively. The overall outline template isn't strictly required, but it helps with visualizing the process. It's also handy for aligning the rotating shapes.
Follow Your Dreams quilting template
Follow Your Dreams quilt template

​There's an even easier way to build this design using just one greatly simplified template. The 3-lobed shape at the right, traced 4 times, will capture all the intersecting lines of the pattern with very little repeated marking of the same lines.
Picture

Not every quilting design will lend itself readily to the template method.  Spiraling lines are particularly template-resistant.  But once you learn to look for the solid shapes within a design, marking with templates is a breeze.
​
0 Comments

Indispensable Tips for Precision Quilt Piecing, Part 4: Pressing

2/8/2017

0 Comments


Part 4 in a series. Click here for Part 1; Part 2; Part 3.

Ironing used to be a big thing. Back in the day, my mother had a huge basket of weekly ironing. It included not only my Dad's white work shirts, which she starched, but his cotton boxer shorts (which, presumably, she did not).

Ironing clothes is high on my list of truly odious domestic chores. Ah, but ironing fabric yardage is another game altogether, and one of my favorite phases of the quilt making process.  That brings me to my first tip for this week, which is actually not a tip so much as a rule.

Always press before cutting.

To pre-wash or not to pre-wash? Both approaches have their adherents. Personally, I'm a dedicated pre-washer. For one thing, washing every bit of fabric before it enters my stash means ironing it, which means spreading it out on my ironing board, caressing it, examining it, admiring it .... Fellow fabric-lovers, you know what I'm talking about.

So the fabric gets washed, then ironed, then folded and filed away.  Sometime later (maybe years later), it comes back into the light of day to be cut. 

At this point, those storage folds are persistent creases. If I'm cutting a strip across the whole width, I don't have to unfold it, so that's fine. But as soon as I need to unfold to make a cut, those creases have got to be pressed out.

For scraps, which may have been sitting in a big crumpled jumble in a bag, the pre-cut pressing is even more urgent.

Sure, it all gets flattened under your transparent ruler, right? Not good enough. Press it.

Always press seams before sewing across them.

Some quilters like to keep a small ironing table right next to their machines so they don't have to keep jumping up to go to the ironing board.  Being a fidgety type, I prefer the variety of sit-to-sew, stand-to-press.  Either way, don't skip pressing your pieced strips before joining them to the next patch. Finger pressing doesn't do it.  You need that whole strip nice and flat.  See Part 2, Aligning, to understand why.

Press seams to one side.

Does this really need to be said? Don't all quilters press their seams to one side? Actually, not. There are a few mavericks out there who press seams open. I suppose there may be occasions when it helps to distribute bulk, but it places more stress on the seam, and shortens the life of the quilt. 

Press seams towards the darker fabric.

The reason usually given for this rule is that the seam allowances won't show through the darker fabric. That's true. More importantly, habitually pressing towards the darker fabric will almost always keep your seam allowances leaning in opposite directions when joining two pieced strips.

Patchwork quilting depends on value contrast for its effect. It's the contrast of relative light and dark between two adjacent patches that makes them appear as distinct shapes.  
9-patch quilt block
The 9-Patch block at the left uses high value contrast between each adjacent square, creating a clear checkerboard effect. If all the seam in the block are pressed towards the darker fabric, the directions of the seam allowances will alternate.
Of course, there are exceptions. The next pressing tip overrides this one.​

Press seams away from greater bulk.

​Look what happens when your simple 9-Patch block adds a few half-square triangles (HSTs) and turns into a Shoo Fly block.

​ If you press both the bias seams and the straight seams towards the darker fabric, you'll get a concentration of seam allowance bulk right in the triangle corners.  That's going to wreak havoc with your quest for perfect points. 
​
Shoo Fly quilt block
Since you'll be sewing and pressing the HSTs first, you'll probably press the bias seams toward the dark, then press the straight seams towards the light.  No problem, until it's time to join the top and bottom strips to the center strip. If you followed the rule and pressed those seams towards the center dark square, the seam allowances won't alternate.  

For this, we need one more tip ...

Plan ahead.

The more complex your quilt block, the more certain you are to encounter seam allowance conflicts.  Before you set up your assembly line, sew and press one complete block to work out your seam allowance strategy.  Then apply that consistently to each component of each successive block.

Make yourself a quilt-worthy ironing board.

Standard ironing boards are designed for ironing clothes. They're just not big enough to spread out an entire 45-inch width of quilters' cotton.  Plus, they offer very limited real estate for stacking the dozens of fabrics I pull out of stash to audition for a new quilt. For that, I needed a board big enough to land a jet, so I made my own.

Here's my everything-at-a glance schematic of how it's done.
Picture
I made mine 24 x 60 inches.  You can make yours a bit bigger or smaller if you like. Much bigger will start to become unsteady, perched on top of your regular ironing board.

The lengths of lumber that surround the ironing board to hold it in place can be any old thing, as long as it's about 1 inch thick. Cut them anywhere from 6 to 12 inches long. Carpenters wood glue will hold them in place without nails or screws, but the nails/screws hold them steady while the glue dries.  Be sure your nails/screws aren't long enough to go all the way through the board!

To staple the cover to the board, spread your fabric and batting on the floor and lay the board on top of it, then fold the cover around the board and staple. 

I've seen the suggestion that 1-inch gingham check makes a good cover. Not a bad idea, but know that (a) the checks aren't actually 1 inch, (b) the checks aren't square and (c) the gingham you'll find among the quilters' cottons is not generally a sturdy fabric. 
​

Keep up to date with all that's happening at Thimble Garden ... subscribe to my email newsletter below.

0 Comments

Indispensable Tips for Precision Quilt Piecing, Part 3: Stitching

1/28/2017

0 Comments

 
All your attention to the details when cutting and aligning will set the stage for a precision piecing performance. Sewing the seam is where you seal the deal. In this article, I'll give you my favorite sewing machine strategies.
New Home antique treadle sewing machine
"Sylvia," my New Home antique treadle machine.

1. Ease on the Bottom

The concept of ease, while familiar in garment construction, doesn't come up often in patchwork quilting. After all, the pieces of a quilt block are supposed to fit together exactly. Unfortunately, in the real world, that doesn't always quite work out.

In Part 1, Cutting, I talked about fabric grain, and in Part 2, Aligning, observed how mis-matched edge grain will feed through the machine at different rates of stretch. You can think of stretch as being the opposite of ease. In patchwork piecing, ease is the technique to use to counter-act the distorting effect of stretch.
​
To achieve the small amount of ease required to correct to the problem of grain distortion, use this amazingly simple trick. If you are joining two strips, one cut on the unyielding straight grain, and one on the stretchier cross grain, always put the stretchier piece on the bottom. Likewise, a bias edge should always be the under-layer.

Here's how it works: as your fabric passes under the presser foot and over the feed dogs, the feed dogs pull it along while the presser foot pushes back, effectively accelerating the bottom fabric. The effect is enough to ease in a bit of extra fullness without pinches or puckers, very useful in garment sewing.  For quilters, it's a handy trick for curved piecing. 

2. Keep Your Points Cozy

Mariner's compass Quilt Block

​Whether you're sewing a simple 4-patch block or a challenging Mariner's Compass, getting the intersecting seams ("points") to line up exactly is the Holy Grail of precision quilt piecing. 

​With seam allowances pressed in opposite directions (more on pressing next week), it's easy to feel the seams nestle together as you align the patches for sewing. The tricky part is keeping them nestled in that perfectly cozy embrace as they glide through the sewing machine.  

Here again, that push-pull effect of presser foot and feed dogs can either work with you or against you. The two diagrams below show your alternatives in sending the pieced patches through the machine.  (Visualize your fabric in cross-section, traveling from right to left.)

​In the first example, the seam allowances on the top patch are pressed away from the presser foot. You're less likely to have the seam allowances bunch up (at least on top), but look what happens to your nestled seams ... like Romeo and Juliet, they're subject to forces pulling them apart.  It's a quilting tragedy in the making.

Picture
Ah, but if you lean the seam allowances the other way, those same push-pull forces work to tighten the join, and a perfect point emerges.  Don't you love a happy ending? ​
Picture
Now, I recognize that once your seams are leaning a certain way, flipping the fabric over will not change that. But, as the saying goes, fore-warned is fore-armed.  My next tip hints at a way to compensate ...

3. Slow down!

When I started using an antique treadle machine for all my quilt piecing, I noticed right away that ​my piecing precision improved. The reason? At its fastest, the treadle is still slower than an electric machine, giving me time focus on all the details. 

At a slower speed, I also discovered that I can safely sew over pins, a very risky practice at high speeds. If your sewing machine needle comes down squarely on a pin, a bent pin is not your only worry. You also dull the needle, and possibly even break it.  Plus, a tiny fugitive fragment of broken needle can seriously damage your machine.  I still don't advocate sewing over pins in general, but for some tricky point intersections, being able to leave the pin in place is a big advantage. 

4. Measure the seam, not the seam allowance

The more complex your quilt block, the more it will shrink if you over-estimate your 1/4-inch seam. Remember, it isn't the seam allowance that counts, it's the whole seam.  That includes not only the seam allowance, but the width of the thread in the stitching line. 

That, "in the stitching line," bit is important. While the vintage Singer Featherweight is famous for its nearly-perfect straight stitch, in reality, every sewing machine slants its stitches at least a tiny bit. The result is that the stitching line will always be just a bit wider than the thickness of the thread alone. How much wider will vary by machine. 

There's still one more element to add to the seam: the thickness of the fabric. Different fabrics have different thread counts, that is, the number of threads that are woven into an inch. A high thread-count fabric will be woven from finer thread and will be thinner than a fabric with a lower thread count. If that sounds like a silly consideration to you, think about an intersection of six (or more!) points. The multiple layers of fabric involved in the seam start to add up.

Especially if your quilt block is a complex one with lots of seams, it's worth testing your seam width. Cut five 1-inch squares and sew them together end to end. After pressing all seam allowances to one side, the strip should measure exactly 3 inches. Or, if 1-inch squares are too finicky, make them 2 inches. Then you'll get an 8-inch strip. Keep testing and adjusting until it's perfect, then mark it on your throat plate with tape.

Stay Tuned for Part 4 of ​Indispensable Tips for Precision Quilt Piecing.

Next week, I'll wrap up this series with a few tips on pressing, PLUS how to make your own aircraft-carrier sized pressing table.
​
0 Comments

Indispensable Tips for Precision Quilt Piecing, Part 2: Aligning

1/21/2017

0 Comments

 
Your quilt patches are all cut.  (If not, go back and read Indispensable Tips for Precision Quilt Piecing, Part 1: Cutting.)  Now you just grab those patches two at a time and sew them together.  Simple as that.  

Well, not quite. Before you can sew them together, you have to line them up, and exactly how you line them up before sewing can make a big difference in how well they are lined up after sewing. Here are my top 3 tips to help:

1. Align the Whole Patch, Not Just the Edges

Sitting at my sewing machine with a stack of strips to sew, I used to just pick up a pair, hold them up in front of me while lining up the seam allowances, then sew.  It was simple.  It was fast.  It was not particularly precise. 

Until they are actually sewn together, locked in place by a line of stitching, two pieces of fabric can, and very often will, move.  Pinning can help, but seriously, we all  know that nobody wants to pin every seam.  

​My preferred solution is to use the friction of fabric against fabric to help prevent slippage. So put those two patches down on a flat surface, line them up nice and square, and smooth them together. Less slipping is guaranteed.
​

2. Cut Corners

We all love a good shortcut technique, but this isn't one of them. The corners we're cutting here are the excess points on triangular patches, what are commonly called "ears."  

When you're sewing half-square triangles (HSTs) together into squares, there's no problem: the whole patch lines up. But if you're sewing a square side of just one triangle to a rectangular piece, there's that ear sticking out. Not such a big deal, but it gets more complicated. Think of the diagonal piecing of a long border strip.

We all know that HSTs need to be cut 3/8-inch larger than the square they will form after sewing.  (And if you didn't know that, now you do.) So trimming off that 3/8-inch triangle tip will square up the seam.  The trick is knowing which direction to cut.  A picture is worth a thousand words, so here are some diagrams to make it all perfectly clear.
Picture
Picture

3. Match the Fabric Grain

​Picture this: you're seaming two identical quilt patches, nothing tricky here, just plain ol' rectangles. You feed them through your sewing machine with the edges perfectly matched at the start, but somehow, in that 4 to 6 inches of stitching, something has gone wonky, and the edges are not perfectly matched at the end of the seam.  What happened?

Chances are, this is a case of mis-matched fabric grain.  As I described in Part 1: Cutting, the cross grain of the fabric will have a bit of stretch, while the straight grain will not. Often, this difference in fabric stretch is enough to make two fabric edges distort at different rates as they pass under the presser foot. Two edges that were exactly the same length before sewing no longer match after sewing. The longer the seam, the more pronounced the distortion will be.

You can avoid this effect when sewing strips together, by making sure to match edge grain. That is, sew two straight-grain edges together, or two cross-grain edges.  In cases where matching grain is not possible, there are some simple ways to minimize grain distortion while sewing.
​

Coming Up Next ...

I'll talk more about sneaky cures for grain distortion, how to get perfect points, and the pursuit of the elusive 1/4-inch seam in my next post, Indispensable Tips for Precision Quilt Piecing, Part 3: Stitching. 

Subscribe to my email list below to notified!
​
0 Comments

Indispensable Tips for Precision Quilt Piecing, Part 1: Cutting

1/14/2017

0 Comments


Precision Piecing, Broken into Parts

Precision quilt piecing
There's more to perfectly precise quilt piecing than a steady 1/4-inch seam. In fact, sewing the seam is the third step in what I consider the 4 components of precision quilt piecing: 

  1. Cutting
  2. Aligning
  3. Stitching
  4. Pressing

​(I tried to come up with another word for Cutting that starts with a "G" so that the 4 steps would spell G.A.S.P., but somehow "Gouging" didn't feel quite right.  I'm open to suggestions.)
​

Component 1: Cutting

My grandmother, Edna Bannister Weitkamp, made all her beautiful quilts without the benefit of a rotary cutter and transparent ruler.  I remember her marking out cutting lines on her fabric with a ball-point pen, using cardboard templates cut from empty cereal boxes.  For curved piecing, I still use her method, though I swap the ball point pen for a very sharp pencil. ​

Luckily for us, we quilt in the age of the rotary cutter, gridded cutting mat, and transparent ruler.  Volumes could be (and probably have been) written about tricky techniques for all the specialized rulers available. For this article, I'll just focus on the rotary cutter, and the one essential rule of rotary cutters: keep it sharp!

Slash the rotary cutter
To keep your rotary cutter in top condition, treat it as you would your best pair of shears: use it only to cut fabric, never paper.  Just as with scissors, cutting paper with your rotary cutter will dull the blade. 

And never, ever use it to trim window screen when you're repairing the screen door!  No, not even the vinyl screen, and certainly NOT the aluminum stuff.  Aluminum screening will make little notches in the blade that will leave "skips" of un-cut threads in your fabric.  Don't ask me how I know that.

​When your rotary blade starts leaving "skips," whether due to abuse or long use, it's time to replace it.  Dispose of the old blade safely (I wrap mine in masking tape), or put it in a box clearly labeled, "old blades for cutting paper and window screen."

Whether you're cutting with scissors or a rotary blade, it's generally not a good idea to try to cut too many layers of fabric at once.  Cutting too many layers will be likely to cause distortion from friction drag.  For scissors, the cautious maximum is 2, or 4 for a rotary cutter. 

Fabric grain is also an important consideration in cutting.  All woven fabric has 3 distinct grains, or directions in the weave.  The straight grain is along the length of the fabric, that is, parallel to the selvages.  In this direction, fabric will have virtually no stretch.  The cross grain runs from selvage to selvage.  Fabric stretched across the grain will give a little, then return to its original shape.  Bias refers generally to any diagonal cut, or more precisely to a 45-degree angle. Fabric has maximum stretch on the bias, but will not return to shape after stretching.

The different stretch characteristics of the 3 fabric grains come into play in a big way in aligning, the second component of precision quilt piecing.  For cutting, what's important to note is that your strips and patches should be cut square with the fabric grain.  

In general, it's best to cut strips across the grain.  That is, the long side of the strip should be on the cross grain.  Of course, yardage limitations will sometimes dictate straight-grain strips.  I'll discuss that further in the next article, Indispensable Tips for Precision Quilt Piecing, Part 2: Aligning. 

Subscribe to my email list below to notified!
​
​​
0 Comments

The Zen of Un-doing

1/11/2017

0 Comments

 
Ah, relaxation.... This afternoon, I put on some favorite music, poured a steaming cup of tea, and settled in to "frog" an unwearable disaster of a sweater that I'd spent the last two weeks knitting. (Rip-it! Rip-it!)

Now, ripping out knitting is not nearly so tedious a chore as ripping out a sewn seam. With knitting, you just unfasten the last stitch, tug on the yarn end, and the whole thing unravels, zzzip! Even so, when there's 900 yards of yarn to pull out and re-wind into balls, it takes a bit of time.
 

Seam ripper
Regardless of the tedium factor, for knitting or sewing, the basic equation of ripping-out remains the same:
 
​Time spent doing
+ Time spent un-doing
= Effort with nothing to show for it.
​

I'm not a perfectionist. (Don't believe those ugly rumors you've heard about me.) Often enough, when I've done my best, it still isn't perfect.  Actually, with knitting, that's nearly always! What's important to me is making every project the best I can make it. Doing-over in order to do it better keeps moving my personal "best" that much closer to "perfect."

​Some of my friends think I'm crazy, but here's my "Zen" philosophy of ripping out:  

In life, when I take a wrong turn, make a bad decision, or otherwise make a mess of things, I have to live with the consequences. Not so in knitting! There, I get a do-over. In fact, I get as many do-overs as I want, and that makes me a very happy frog. 
​
​Obviously, ripping-out is never ideal.  We'd all ​much prefer to get it right the first time. That's especially true in quilting (even if you've got your pal, "Jack" standing by to help).

In the coming weeks, I'll be sharing some of my favorite tips for precision quilt piecing, to help you get it right the first time, and every time.  Be sure to subscribe to my email list so you don't miss a thing.
​

0 Comments

Anatomy of a Lost Ships Quilt,                 Part 4: Setting Sail

7/23/2013

1 Comment

 
New to this series? Go to Part 1 here.
Picture
Sometimes, there's only one obvious setting for a quilt. (Just kidding!)

Actually, in all my years of quilting, I don't believe I've ever experienced "only one obvious" answer to any choice. Not which block, which fabric, which thread color, which quilting design, which batting, which backing ... The list goes on.  Choosing a quilt layout, or setting, is no different.

For my Lost Ships quilt, given the size and number of my blocks (10-inch blocks, 6 across by 7 down), and the size of the quilt I wanted to make (a large queen), I knew I would need sashing.  I also was pretty sure I wanted to keep all the blocks oriented in the same direction.

To keep the diagonal movement in the blocks consistent across the whole quilt, I decided on 2-inch sashing, the same width as the half-square triangle strips within the blocks.  Extra HSTs made corner blocks in the sashing and further emphasized the diagonal lines.

I had the perfect blue fabric for the sashing. Well, almost perfect. The only problem was that there wasn't quite enough of it. (Don't you hate when that happens?) The simple solution was to eliminate the border sashing. Naturally, I did not choose the simple solution. Instead, I found another blue fabric for the outermost rows of sashing strips.

Of course, my near-certainty about wanting sashing didn't keep me from firing up my quilt-design software (I use EQ5) to experiment with other options. In the process, I discovered some interesting secondary patterns that can be created with a sashing-free Lost Ships block (see below).

Picture
Picture
Picture
1 Comment

Anatomy of a Lost Ships Quilt, Part 3: Assembling the Fleet

6/11/2013

1 Comment

 
New to this series? Go to part 1 here.
Picture
Many beautiful quilts can be made from blocks that are all the same.  I've made a few of those myself.  They can go pretty quickly, with all those identical blocks produced assembly-line fashion.  

The problem with that style of quilt is that pretty much all the creative part happens up front, with the choice of fabrics.  Once that's settled, all that's left is craftsmanship.  

Don't get me wrong; craftsmanship is a crucial --and very satisfying -- part of quilt-making.  It's just not necessarily the most fun.

While we all may have different ideas about what's least fun in quilting (for me it's either basting, marking, or removing basting stitches, depending on which I happen to be doing at the time!), I'm betting there's a considerable consensus about what's the most fun. Playing with fabric, of course!

My Lost Ships quilt is 6 blocks wide by 7 blocks long.  That's 42 opportunities to choose fabrics for a lovely little miniature quilt. Forty-two chances to make that brown floral sing, or at least drown out the flat notes in its voice.

So here is a sampling of the blocks. Some are monochromatic (all greens, or all blues), while others use contrasting colors. Most use a light to medium value for the central triangle, but a few have a dark tone there. Some use very sharp light/dark contrast, but a few are rather close-valued.  The only constant is that the half-square triangles that make the outer edge of each block are always the lightest value. This is what I'm counting on to keep the variety somewhat unified.


Picture
Picture
Picture
Picture
Picture
Picture
Picture
Picture
Picture
Coming up:  Setting Sail
1 Comment

Anatomy of a Lost Ships Quilt, Part 2:       Over the Rainbow

6/7/2013

0 Comments

 
New to this series? Go to Part 1 here.
Picture
When the focus fabric for a quilt is dull, there's a grave danger that the whole quilt will be D-U-L-L. Now, despite my peculiar penchant for brown florals, I really don't go for dull quilts so much.  
​

​If you look closely, there's actually quite a bit of color in that brown floral.  It appears in small quantities and subtle shades, but it's there: yellow, blue, green, pink, red.  I raided my stash to find those colors.  

There were a good assortment of greens, some decent blues, but only two yellows. The reds and pinks included lots of the itsy ditsy florals that were my very first stash acquisitions. Overall they had the same effect as the focus fabric. This quilt was definitely still in the danger zone.

Color aside, what this fabric has going for it is:
  • lots of value contrast; 
  • a fairly big, bold pattern.  
And that's exactly what was needed in the quilt block.  The Lost Ships block was perfect.

Coming up:  Assembling the Fleet
0 Comments

Anatomy of a Lost Ships Quilt, Part 1:     Great Expectations

5/16/2013

1 Comment

 
Part 1 in a series of 4
PictureThe tedium of basting makes Nellie sleepy!
After a long interval of obsessive knitting, I'm finally quilting (and blogging) again!

​At first, my return to quilting did not go well. With two appealing projects -- a large bed quilt to be finished and a baby quilt to be started -- I found myself in a paralysis of indecision. I just couldn't settle on quilting motifs for the big quilt, or fabrics for the little one. So frustrating! 

Eventually,  I realized that I'd come to think of these projects as "The Masterpiece" and "The Heirloom." Phew! How do you spell S-T-R-E-S-S ? The solution became obvious. I needed to find a low-pressure project, something I could just play around with ... at least until I could tone down the melodrama of my overblown expectations.  

So I headed to my mysteriously abundant hoard of ugly fabric. What's better for low-pressure messing around than ugly fabric? I mean, you can't really ruin it, can you?  I pulled out a big chunk of brown floral. (Yeah, I collect those.)

You know this fabric.  I blogged about it previously here. The time had come to reveal the latent beauty in this hideous ... er ... challenging print.  

Coming next:  Over the rainbow.

1 Comment
    I'm a Craftsy Designer
    Follow
    Benchmark Email
    Email Marketing Services by Benchmark

    RSS Feed

    View by month:

    July 2017
    March 2017
    February 2017
    January 2017
    December 2016
    July 2013
    June 2013
    May 2013
    April 2010
    January 2010
    October 2009
    February 2009
    January 2009
    December 2008


    Categories

    All
    Free Downloads
    Knitting
    Lost Ships
    Mystery Quilt
    Pets
    Pineapple Quilt
    Quilting
    Quilt Marking
    Scraps
    Tips Techniques
    Ugly Fabric

Home                About                  Contact Us                  Privacy Policy                  Terms of Use                  Site Map

Benchmark Email
Email Marketing Services by Benchmark