• Blog
  • Home
  • My Story
  • Patterns
  • Tools
  • Contact Us
 

The Batman Diary, Day 3: Refining the Pattern for the Batman Figure

7/21/2017

0 Comments

 
Crafting the Batman quilt was a lot of fun, but it certainly involved a lot of trial and error.  Actually doing the construction turned out to be easier than I expected. Planning the process was the bigger challenge.​
Batman quilt pattern
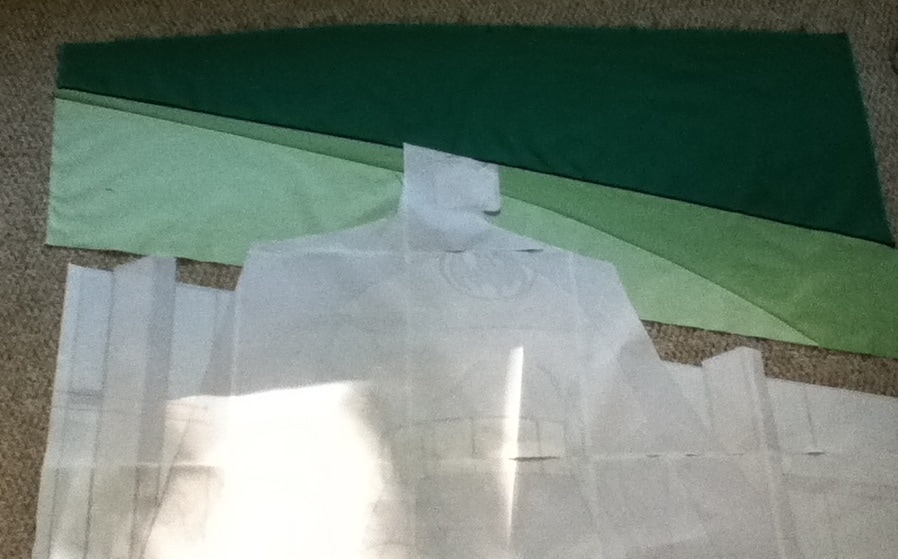
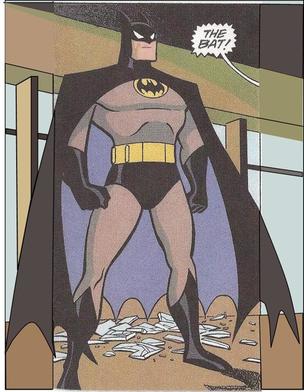
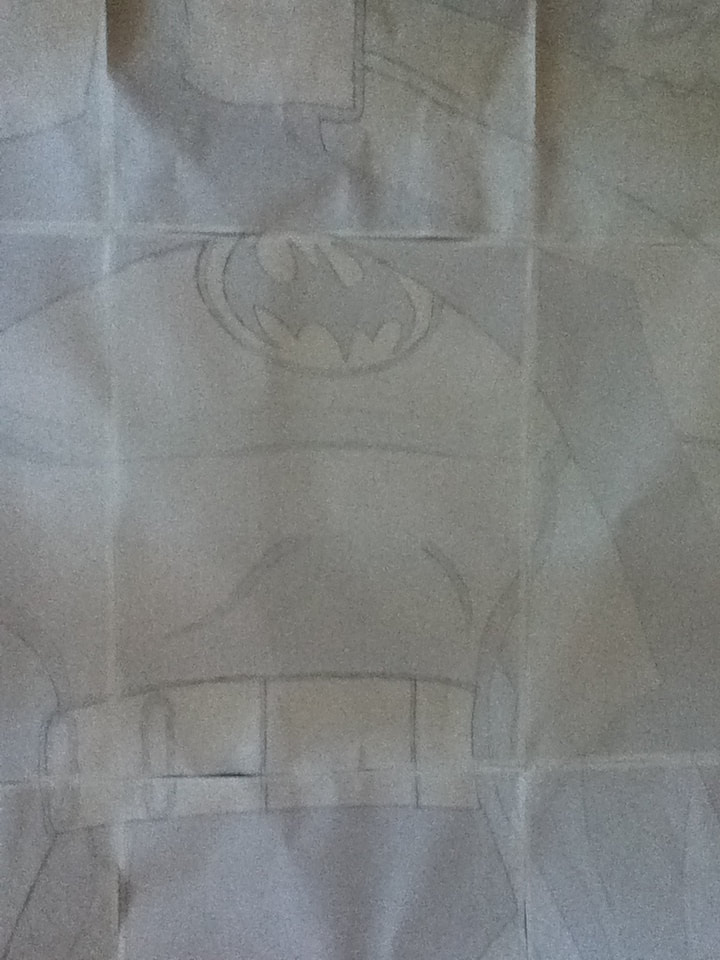
Back on Day 1 of this series, I told you how I'd expected to use the hugely-magnified scan of the original comic as my pattern.  That worked fine for cutting the background architecture, but as soon as I started on the figure, the system broke down.
True, the copy I printed was very pale. Very pale. While that didn't help, it wasn't the real problem.  Apparently, magnified to more than 500% of original size, all the lines in the comic got very fuzzy.  Tracing over them with a sharp pencil clarified the nature of the problem, but not the image. I'd have to go back to the (computer) drawing-board and produce a precise line drawing.  
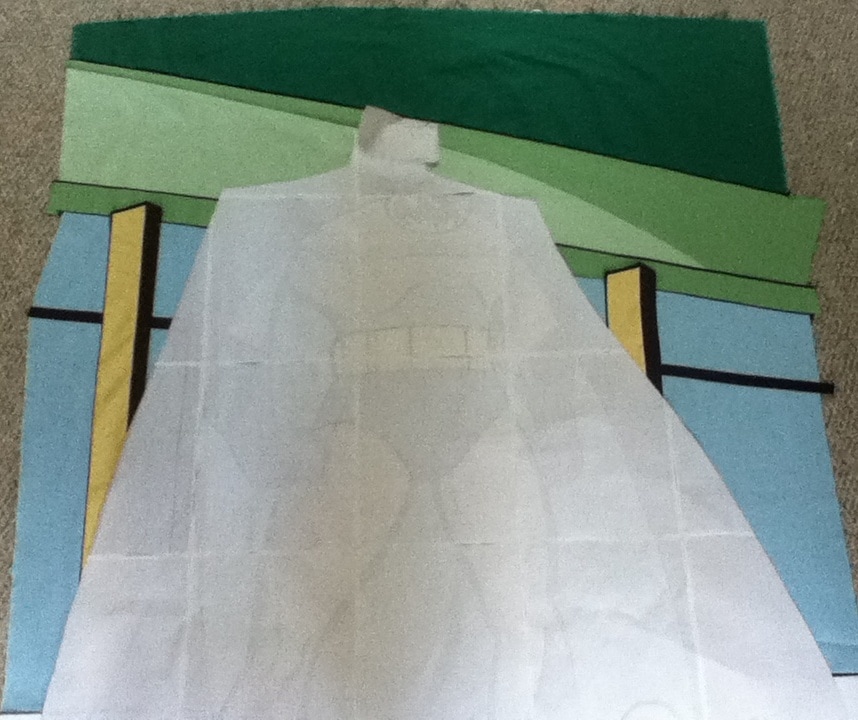
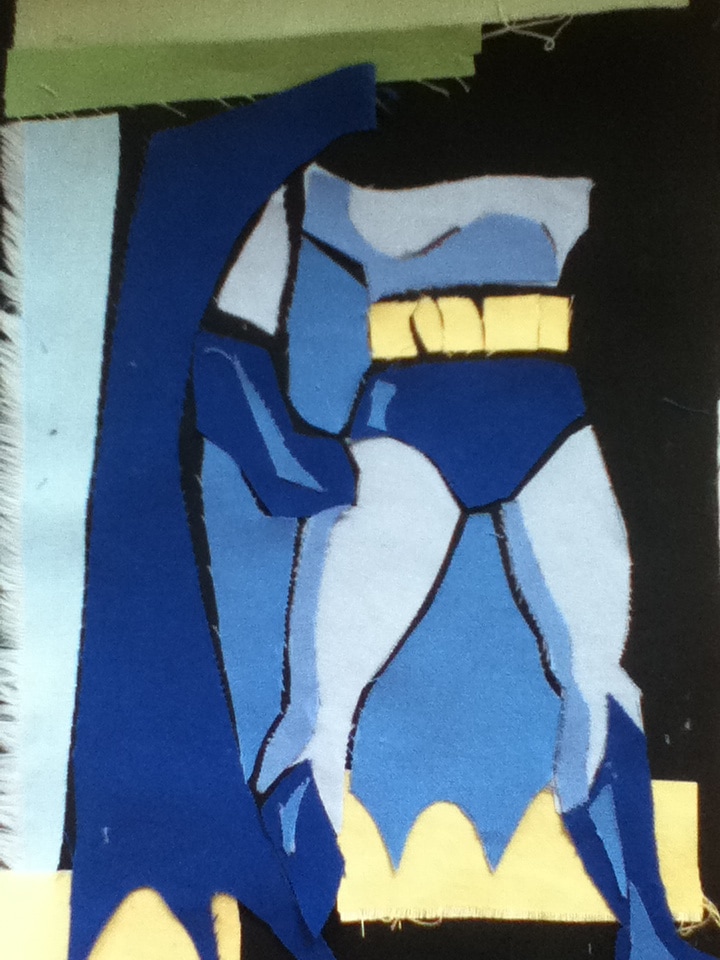
There was the sketch I'd made for the color trials.  It was way too rough and angular in the details, but a good place to start. 

Since I'd already completed the piecing of the background, the new version only had to refine the figure.
Batman quilt rough sketch
Batman quilt pattern
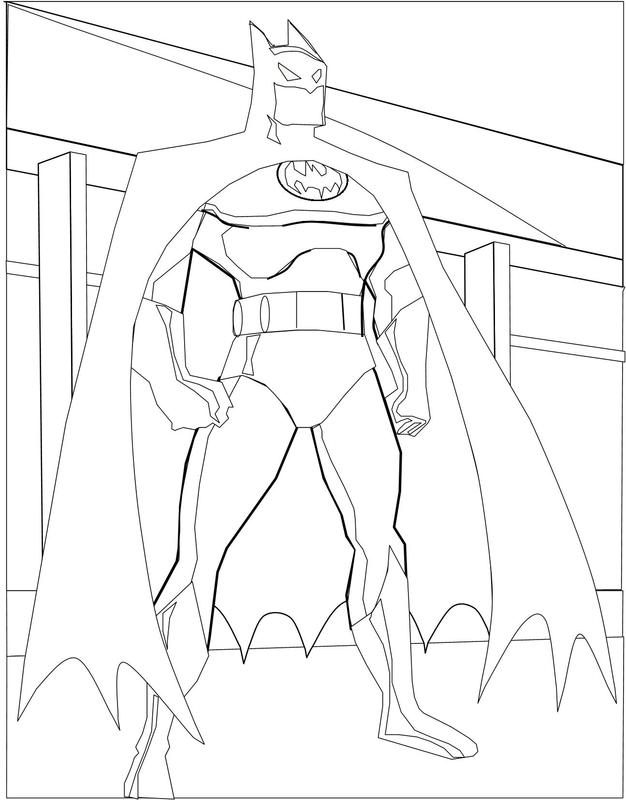
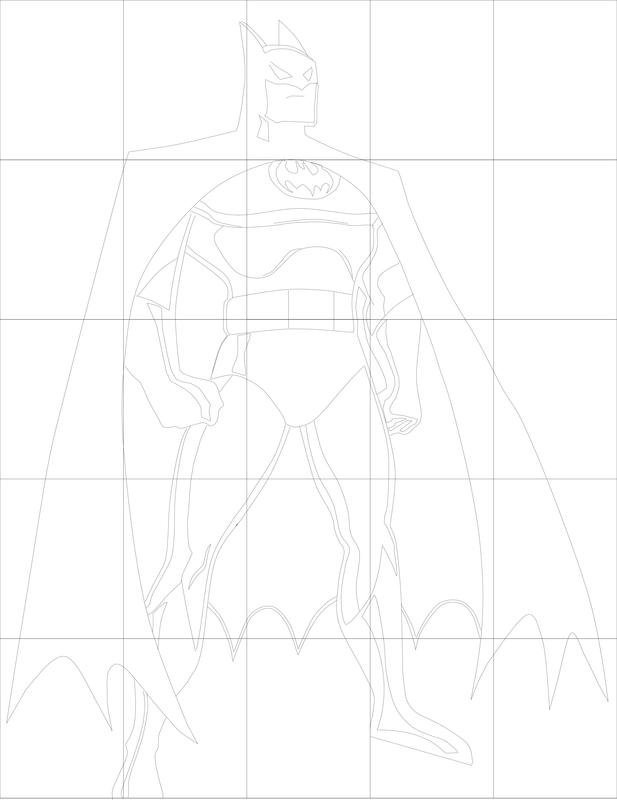
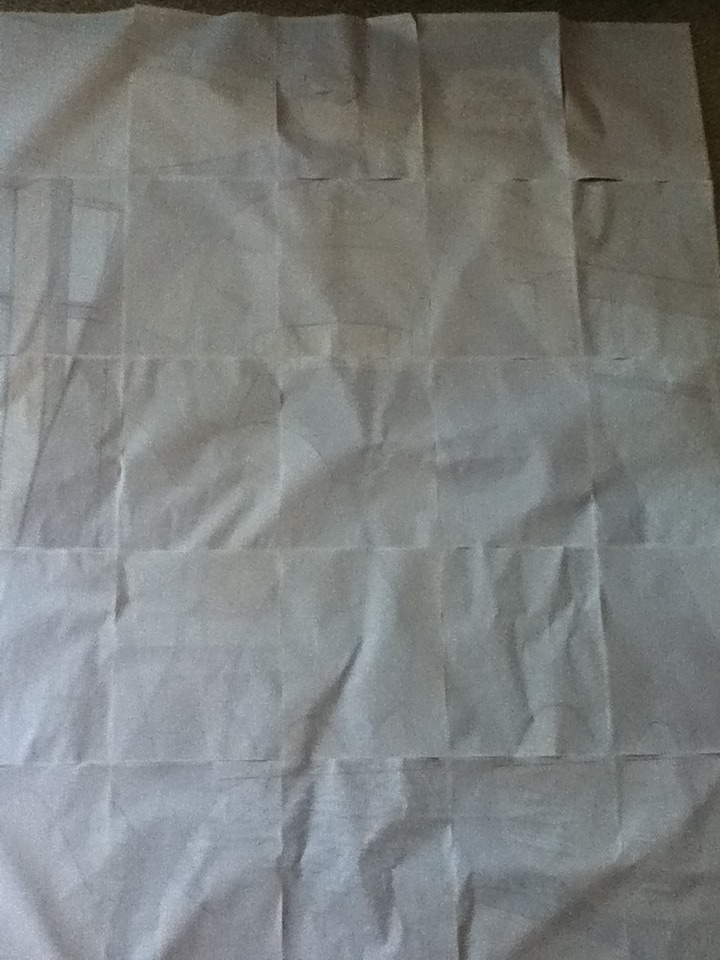
With a grid added to divide the image into 25 sheets of paper, it was ready to print.

Coming up next: Holy seams, Batman! We're actually sewing!
0 Comments

The Batman Diary, Day 2: Piecing the Bat-Architecture

7/8/2017

2 Comments

 
As I described in Day 1 of the Batman Diary, the pattern for the Bat-quilt would require 25 sheets of paper. That's a lot of paper, but my greater concern was that's a LOT of ink. So I printed out a very pale version of the enlarged picture. Maybe too pale? I could barely see the design. I forged on anyway.
Batman quilt pattern
But where to start? Working from the center outward was one option, and maybe a good one. Instead, I chose to work from the edges in, and from the top down. Though I confess, that decision was really based on wanting to start with the easiest part.  That long, straight seam across the top was the clear winner. (Actually, two long straight seams; there's the dark green, then a narrow strip of black, then the lighter green.) The next seam would be a curve, but a long, gentle curve. Piece of cake.
Batman quilt piecing, phase 1
My working method was similar to piecing quilt blocks: build up sections with straight machine sewing, then join to other sections with more straight seams. In places where that method broke down (like the angled yellow-and-brown window frames in the photo below), I did what I could on the machine, then finished up the "hard parts" with hand-applique.
Batman quilt piecing, phase 2
As I selected each section for sewing, I cut the corresponding shapes from the paper pattern to use for cutting the fabric, adding seam allowances to each piece. 
Batman quilt piecing, phase 2
In cutting, I usually allowed a fairly generous margin for error. Later, I'd go back and re-assemble the paper pattern, then use it to mark where the actual seam lines would fall.
Coming up next: Now the fun begins! Piecing Batman.
2 Comments

The Batman Diary, Day 1: Designing the Bat-Quilt

7/2/2017

0 Comments

 
Flying Bat-baby
When I saw my infant grandson outfitted as Batman for his first Halloween, I knew that a crib size Bat-quilt was in my future. ​
However, the path from the certainty of "must make a Bat-quilt," to the actual quilt, was far from certain. I'd never attempted anything remotely like this.

​​The first hurdle was finding the right image. On a visit to my son's home, I surreptitiously flipped through his collection of Batman graphic novels. Once I'd found the perfect image, I had to be even more sneaky about making a quick photocopy.
Well, actually, the comic frame wasn't quite perfect. It had a bit of extra detail that I surely would eliminate (not a problem).
Batman cartoon frame
Enhanced Batman cartoon frame

More importantly, the picture was too narrow. I'd need to ​add a bit of drawing on each side. Fortunately, expanding what was already there didn't require a lot of skill, or even much imagination. Extend the architecture; complete the flare of the cape. Done.
So far, so good, but the black and grey colors in the original were not looking like a quilt for a toddler.  The brighter, shades-of-blue Batman was what I was looking for.
The next step was very computer-intensive, as I traced every single colored shape from the drawing. (There's probably all sorts of software available to automate all that tracing, but I use a slow, tedious method, using Microsoft Publisher. I do not recommend it to anyone with a normal tolerance for tedium and frustration, but it works for me.) Assuming I'd have the original comic image to use as a pattern , I made this tracing a bit rough--no finesse in the drawing, just enough detail to see the color patches.
Then I played with re-coloring all those shapes in different shades of blue and green. Thinking ahead, I chose my palette from the colors available in Kaufman's Kona Cotton. After all, I wanted to be sure that I could actually find fabric to match my color choices.  You can see two versions of color trials below. ​
Batman quilt color trial #1
Batman quilt color trial #2
Honestly, I rather prefer the version on the left for its moodier atmosphere. But some of the colors are a bit too close in value.  I decided to go with the version on the right.
With the drawing finalized, it was time to scale it up. The computer made this part easy. My expanded comic  was proportioned to cover one sheet of paper; scaled up to 500% of original size, it would make a 42 1/2 inch by 55 inch quilt. The pattern would print out on 25 sheets of paper. Perfect. 
Batman quilt design
Using the full-size pattern and my favorite color trial , I calculated yardage requirements and placed my order. I'd need black, a bit of white and peach, brown, orange, 2 shades of yellow, 3 of green, and 5 of blue. Phew! 
Batman quilt color sample
​When the fabric arrived, I was still not completely convinced I'd got the colors right. With a few snips cut off a corner of each piece, I made a tiny color trial. It looked good. Time to sew!

Coming up next: piecing the background architecture.
0 Comments

Christian Quilts for Every Season, Part 4: Thanksgiving

3/29/2017

1 Comment

 
There's no rule that says ordinary has to be boring.
Picture
In the church calendar, all those Sundays that aren't part of a special season, like Easter or Christmas, are called "Ordinary Time."  You'd think the church fathers could have come up with something a little less, well, ordinary, but that's what it's called. My green pulpit banners, like the one pictured above, are my attempt to add a little pizzazz to the unremarkable parts of the calendar.

Picture
Picture
This one, actually, was made especially for Thanksgiving, but the Eucharistic symbols of bread (the wheat), wine (the grape vines) and the chalice are appropriate for any time of year. ​
Picture
The background block for this hanging is called "Peace and Plenty," which struck me as particularly fitting for Thanksgiving. 

​Along with the other designs in this series, the pattern for this banner will be available in my Craftsy shop.
​
Picture
Subscribe to my email newsletter to be notified when new patterns are posted. 
1 Comment

Christian Quilts for Every Season, Part 3: Pentecost

3/20/2017

1 Comment

 
​Hands down, this is my favorite.
Pentecost banner
Of all the hangings I've made for my church (5 so far, with another in progress), the Pentecost banner is my clear favorite. 

The Pentecost story has captured my imagination since I was quite young, and why not? It has all the elements of a blockbuster movie: sound effects (the sound of a rushing wind so loud it drew a crowd); visual effects (tongues of fire!); and transformative human drama. 

If that wasn't enough inspiration, I kept thinking of these lines from the dazzling poem, "God's Grandeur," by Gerard Manley Hopkins:


      The world is charged with the grandeur of God. 
            It will flame out, like shining from shook foil;


​Seriously, "shining from shook foil"? Just close your eyes and picture that.

Then the poem ends with this:


            Oh, morning, at the brown brink eastward, springs — 
      Because the Holy Ghost over the bent 
            World broods with warm breast and with ah! bright wings.

      
I wanted to pull all those elements into my design.  The flaming brilliance.  The rushing wind -- if not the sound of it at least the sense of powerful movement. The image of the Holy Spirit descending as a dove.

​For the flaming effect, it helped that the traditional liturgical color for Pentecost is red. And what would be more natural than a Bargello piecing pattern, since this quilt- piecing technique is adapted from "flame stitch" needlepoint?   I chose 11 tonal prints in a range of red hues, from almost-orange to almost-violet.

The color variations in the Bargello pattern create a sort of undulating movement, but I wanted something more directional and forceful, to bring in the drama of that rushing wind.  I used golden rays, fanning out from the top center of the banner.  Borne on these rays of light, the dove of the Holy Spirit plunges downward.  The rays, 7 in number, also represent the Seven Gifts of the Holy Spirit. 


Pentcost banner, detail of red fabric
Pentecost banner, dove and rays
For all the appliqué elements of this piece, I used the needle-turn technique, and I'm honestly not so thrilled with the results.  If I had it to do over,  I'd use fused appliqué with machine-overcast edges. Or maybe not. My needle-turn skills have improved enormously ​since I made this.​​
​
Gian Lorenzo Bernini - Dove of the Holy Spirit (ca. 1660, stained glass, Throne of St. Peter, St. Peter's Basilica, Vatican)
Sometime after my Pentecost banner was finished, I discovered the gorgeous stained glass in the photo at left. It was designed around 1600 by Gian Lorenzo Bernini, a genius of Italian Baroque art and architecture. 
​
I'm glad I didn't find it sooner, or I might have tried to duplicate it. As it is, I think my hanging incorporates two or three of the same design elements. 

Like the Advent and Easter banners, the pattern for this one will be available for instant download in
my Craftsy shop.
1 Comment

Christian Quilts for Every Season, Part 2: Easter

3/15/2017

0 Comments

 
Picture
These past 2 weeks, I've been enjoying a bit of imaginary time travel, as I analyze my pulpit hangings to write up the patterns.  Re-visiting projects that were completed several years ago has transported me to an earlier moment in my quilting journey.  

At the time I made these little banners, I was very much making it up as I went along.  I love that free-wheeling, totally spontaneous working method.  It often results in beautiful designs, surpassing anything my analytical left-brain would have created.  On the other hand, that sew-first-think-later approach can lead to construction processes that are, shall we say, less than optimally efficient.

Take my Easter banner.  (No, actually, you may not take mine.  Go make your own!)  This was my first venture into liturgical designs, made as a memorial to a dear friend and all-round amazing lady, Jean Curtis.  It needed to be stunningly beautiful, to do Jean justice.  Taking shortcuts of any kind was not part of the plan.

Two Themes

There are two themes in this design:  Resurrection, of course, since it's Easter, and also the Trinity.  Come to think of it, this same design, without the floral appliqué, would be perfect for Trinity Sunday, white being the traditional color for both Easter and Trinity Sunday.
Picture
​The theme of Resurrection is expressed by the white lilies, a time-honored symbol of Easter. They bloom before the cross, in an orb of golden light.  Using two lighter values of gold in the circle creates the illusion of the cross remaining visible behind the luminous circle.  Life triumphs over death.

The Trinity theme is developed throughout the hanging, starting with the three white lilies. Each lily holds three embroidered stamens, and the lilies bloom on a stalk with three sets of three leaves.
Picture
The Thousand Pyramids design of the background takes the Trinity theme into the very substance of the banner. Triangular patches, cut from an assortment of white-on-white fabrics, combine to form innumerable expanding triangles. The cross, and even the circle of light, are composed of Thousand Pyramids patchwork. 
​
Here's where I may have gone a bit overboard.  Honestly, all that tricky piecing of all those tiny patches in the circle does not show up behind the bold floral elements.  Plus, it makes a rather lumpy substrate for the appliqué.  In writing up the pattern, I greatly simplified this part.

​Other than that, I'm still totally in love with this design.  Like the Advent
 banner, the Easter hanging is finished with a row of prairie points on the bottom edge, and a wrap-around backing with integrated hanging sleeve. This is one of my favorite, genius time-saver techniques for small wall-hanging quilts. 
​

Go Make Your Own!

​With an entire month left before Easter, there's still plenty of time to stitch up this banner.  You can download the pattern here.

Coming next: the Pentecost banner!
​

Follow my blog with Bloglovin
0 Comments

Christian Quilts for Every Season, Part 1: Advent and Lent

3/8/2017

0 Comments

 
Last week, I introduced the suite of liturgical hangings I designed for the Chatham church.  This week, we'll start getting into some details about each design.

The first design I'll share was made for the Advent season, but it serves equally well for the season of Lent, which began last week. ​For both Advent and Lent, the traditional liturgical color is purple.  This banner uses textural purple prints in 5 graded values, from nearly-black to nearly-white.
Liturgical banner for Advent or Lent
At the center of the piece is a brilliantly white element, which reads as a star (for Advent) or a cross (for Lent). The narrow shapes and sharp points give the impression of  slicing open the center of the hanging, admitting a burst of light into the purple darkness.

 "...And God separated the light from the darkness." (Genesis 1:4) 

The placement of the purple fabrics, progressing from the lightest values at the center to the darkest at the edges, continues the theme of spreading light.

Construction of the hanging is simpler than it looks.  There are 24 6-inch blocks of identical design, differing only in color. I named this block design, “Genesis", for the dramatic way it divides the light and dark values. 

The same set of 6 templates is used for both the lighter and darker halves of each block, with no left-handed/right-handed variations of the block templates to keep track of. Avoiding mirror symmetry in the blocks keeps the overall design dynamic.

The central star may look complicated, but it's really an easy trick. The "arms" of the star are added by machine on top of each quadrant of assembled blocks.  Then the 4 quarters are seamed together.  Slick.

The old pulpit hanging in the church had long drapery fringe on the bottom.  Not wanting to use fringe, I opted for a row of prairie points to finish the lower edge. 

Instead of the standard quilt binding, I used a wrap-around backing technique.  That has the advantage of forming an integrated hanging sleeve, and means no binding to sew on.

The pattern, available now in my Craftsy shop, includes full-size templates for the blocks and the star, plus detailed piecing and assembly instructions and a clear color-placement chart.

Next week, I'll share my Easter hanging, which features lavish appliqué over a thousand-pyramids background.

​
0 Comments

Making history with quilts

3/1/2017

3 Comments

 
In 2017, the tiny town of Chatham, NH, celebrates its 250th anniversary.  The town, 300 residents strong, will be celebrating with special events all through the year.  In the spirit of that celebration, I'll be sharing my own small contribution to Chatham history over the next few weeks.

Church, Chatham, NH
Chatham has been my home only since 2005, which makes me definitely "from away." Actually, if I lived here another 50 years, I'd still be "from away." Such is life in rural northern New England.  All the same, I feel a deep connection to my adopted community, and particularly to its lovely little church.

The church, built in 1871, houses a massive bell made by the Paul Revere firm in Boston.  Weighing nearly 900 pounds, it's one of the largest cast by Revere.  The bell traveled by ship from Boston to Portsmouth, New Hampshire.  From there, it was hauled overland by 6 yoke of oxen in the dead of winter.  That's 12 burly beasts! 

Over the past several years, I've made a suite of small quilts to serve as pulpit hangings for the church.  Creating these banners has been some of the most absorbing and soul-satisfying work of my quilting journey.  As I handled the fabrics and meditated on the meaning of each liturgical season, the designs seemed to reveal themselves.

​Each quilt also honors the memory of one of the church's departed elders.  I hope that through my little quilts, the memory of these fine individuals will live on in Chatham history.

​To celebrate Chatham's anniversary, I'll be sharing these original designs, and making the patterns available in the Thimble Garden Craftsy shop.  

Liturgical banner for Advent/Lent
Liturgical banner for Easter
Liturgical banner for Communion Sunday
Liturgical banner for Pentecost
3 Comments

3 Quick Hacks for Faster Hand Quilting

2/21/2017

0 Comments

 
Picture
Quilters who are truly in a hurry to get their quilts finished do not quilt them by hand, so it may seem a bit ironic to offer speed tips for hand quilters.  Maybe I shouldn't call them speed tips.  How about efficiency tips? How about Spend-less-time-on-the-little-time-consuming-things-that-aren't-actually-stitching tips? Whatever you call them, here are three of my favorites:
​

1. Get a Grip

Hand quilting needles, "betweens", are short. Once you get them loaded up with half a dozen tiny stitches, there's not much needle left to grab to pull through the layers. Besides being little, they're slippery. ​
Picture

Struggling to get a firm grasp on my needle is one of my top hand quilting frustrations. Fortunately, it's also one of the easiest to solve.

​There are several grip-enhancing options available for purchase. You can buy a little rubber "grab-it" disc at your local quilt shop. I've used them, and they work quite well. You can also get a "rubber thumb" from an office supply store.  I've used those, too.  They work well enough, but can feel bulky and awkward. Finger cots, small balloons, or a fingertip cut from an old pair of dishwashing gloves also work, though they are not particularly durable.

My favorite needle-grabber is a rubber band. The best are the wide-ish ones used to secure bunches of asparagus or broccoli. (Another reason to eat your vegetables.) You probably have several floating around in a kitchen drawer.

These humble rubber bands have several advantages over the purchased options. For starters, they're readily available and free. If you lose one, no problem! Go back to that kitchen drawer and dig out another one. Unlike the rubber thumb, finger cot, or balloon, you don't have to wear it, so there's no interference with dexterity. Like the grab-it disc, it's easy to park it on the quilt's surface, but I prefer to loop it over my thumb to keep it handy. 

Plus, they come in purple.  
​
​

2. Go Topless


​No, no, no!  Keep your shirt on! I'm talking about your quilting hoop.

Picture
I quilt with a hoop, one of those wood ones like an industrial-size embroidery hoop.  Mine is 14 inches, which allows me to quilt an entire 12-inch block without needing to re-position the hoop.  I can rotate the hoop as needed so that I'm always quilting towards me. That's dandy.

For quilting a border or sashing, it's not so dandy.  Long, narrow sections stitch up quickly, so the hoop needs to be moved along often. Re-tensioning the quilt in the hoop with each move takes quite a bit a time. That's a bother.

The solution is to dispense with the top of the hoop.  In narrow sections, where the quilting design doesn't require rotating the quilt, tensioning the hoop is not necessary.  I just use a clothes pin to secure the quilt at the top of the hoop (as in the photo, above), and leave the rest loose. Re-positioning becomes a matter of sliding the bottom/inner hoop along and re-clipping the clothes pin. ​

3. Say No to the Knot

Many years ago, I took a class at my local quilt shop called, "Big Stitch Quilting." Maybe you've used this technique.  It's a hand quilting method using longer-than-normal stitches and big, very visible thread, like perle cotton.  

With big thread, you're going to make a big knot, which is going to make a big hole in your quilt top if you pop the knot through in the usual way,  

The solution is to forego the knot, and leave a long thread tail hanging out at the start of each section of stitching.  At the end of the line of quilting,  you bury the thread tail in the batting, as usual, but with this important difference:  leave the thread knot-free, and weave it back and forth between your last few stitches.  Visualize the tip of your needle traveling a slalom course through the batting layer, with the stitches as the gates.  Then you go back and do the same thing with the tail at the start of the stitching line.

OK, so that's all about Big Stitch quilting. For regular hand quilting, it's much simpler.

First, you knot your thread and pop it through at the start of stitching just like you always do.  Then at the end, skip the knot and bury the tail in the batting, right up close alongside the last several stitches.  Weave it between stitches once or twice if you can.  Your normal quilting stitches are going to be tiny, so weaving through more than one or two of them will be difficult (and I would never suggest that you do something the hard way).

Don't worry that the thread won't stay buried; just make it long enough.  If you've ever had the misfortune of having to pick out quilting stitches, you know that thread isn't going anywhere.

One more advantage to skipping the ending knot, is that you can continue to quilt closer to the end of the thread. That's a boon for those of us who are always trying to eke out just a few more stitches before re-threading the needle.

Do you have a favorite hand- quilting hack? Share it by leaving a comment below.


0 Comments

Make Your Own Easy Stencil-free Quilting Templates

2/14/2017

0 Comments


After spending months as a UFO (that's quiltspeak for Un-Finished Object), my Lost Ships quilt has finally re-emerged to be quilted.
Lost Ships quilting design
OK, to be honest, it's been waiting more than a few months. More like a couple of years, actually.  The problem was, I had to find just the right quilting design.

It couldn't be too complicated; this quilt has been in progress long enough, and I really want it finished soon. Even so, I'm not ready to settle for something boring for the sake of hand-quilting speed.

The Lost Ships block has two triangular areas of different sizes to quilt, and I wanted those designs to be related, but not identical (because that would be boring). The design also had to fit the Lost Ships theme (because I said so). 

Most importantly, the design had to be template-friendly. That is, it had to be adaptable to my stencil-free approach to quilt marking.

Using a stencil is a great way to mark a quilt. Stencils are available for lots of beautiful quilting designs from online vendors like quiltingstencils.com.  The problem is that I never seem to find what I want in exactly the right size. Sure, you can cut your own stencils.  I've done that.  Frankly, it's a job that always finds me clenching my teeth and muttering, "There's got to be a better way!"

Finally, I discovered a better way.  Unlike stencils, where the quilting lines are cut as narrow channels in the background matrix (tricky to plan and difficult to cut), my template method uses solid shapes (ultra-easy to cut).

Plus, because templates are a "trace-around" tool, they need to be somewhat rigid, but unlike stencils, they don't need to be thin.  That means you don't need that pricey mylar material for your templates.  Any card-stock will do.  A panel from an empty cereal box will do very well, as my grandmother taught me.  (My Scottish great-grandmother would approve.)

Let me demonstrate.


For the Lost Ships quilt, I decided on a pair of shell motifs, one quite simple, the other a bit elaborated. ​
​
The shell motif for the smaller triangle (at right) was simple enough to cut as a template. Despite its multiple lobes, it can be cut along all its lines, and remain intact as a single shape. Marking a quilt with this template will be a straight-forward matter of tracing around the outside edges of the cut-out template.
​
Shell Quilting design
Shell quilting design
The larger shell motif (at left) is more complex. It comprises 5 distinct shapes. There's the shell, in blue, a pair of scrolls, in orange, and a pair of little connecting doo-dads, in yellow.  
​I'll cut this as 2 templates: the blue shell by itself, and all the scrolling parts together.  Again, it's very simple to mark the quilt by tracing around the templates. Lines where the yellow and orange sections intersect are easy to fill in.

Let's look at one more not-so-obvious example.  The quilting stencil shown at the right is "Follow Your Dreams," one of my favorites. ​ It's a continuous-line design; building it from discreet shapes would require several pieces that are smaller than I prefer to handle.
Follow Your Dreams quilt stencil

Instead, the design can be rendered with 3 overlapping templates. The first is the overall outline of the design, and serves to mark the boundaries of the other two, which are rotated to cover the 4 sides and 4 corners, respectively. The overall outline template isn't strictly required, but it helps with visualizing the process. It's also handy for aligning the rotating shapes.
Follow Your Dreams quilting template
Follow Your Dreams quilt template

​There's an even easier way to build this design using just one greatly simplified template. The 3-lobed shape at the right, traced 4 times, will capture all the intersecting lines of the pattern with very little repeated marking of the same lines.
Picture

Not every quilting design will lend itself readily to the template method.  Spiraling lines are particularly template-resistant.  But once you learn to look for the solid shapes within a design, marking with templates is a breeze.
​
0 Comments
<<Previous
    I'm a Craftsy Designer
    Follow
    Benchmark Email
    Email Marketing Services by Benchmark

    RSS Feed

    View by month:

    July 2017
    March 2017
    February 2017
    January 2017
    December 2016
    July 2013
    June 2013
    May 2013
    April 2010
    January 2010
    October 2009
    February 2009
    January 2009
    December 2008


    Categories

    All
    Free Downloads
    Knitting
    Lost Ships
    Mystery Quilt
    Pets
    Pineapple Quilt
    Quilting
    Quilt Marking
    Scraps
    Tips Techniques
    Ugly Fabric

Home                About                  Contact Us                  Privacy Policy                  Terms of Use                  Site Map

Benchmark Email
Email Marketing Services by Benchmark